Soil Stabilization Guide
How to Make Dirt Harden Like Concrete
Making dirt harden like concrete is called soil-cement stabilization — mixing Portland cement into the existing soil, adding water to reach the correct moisture content, and compacting the mix to form a hard, durable layer. Done correctly, soil-cement achieves 1.5–5.0 MPa compressive strength — comparable to low-grade concrete — and lasts 20–50 years without rutting, softening, or dusting. The key difference from laying concrete is that the soil itself is the aggregate — no imported material is needed.
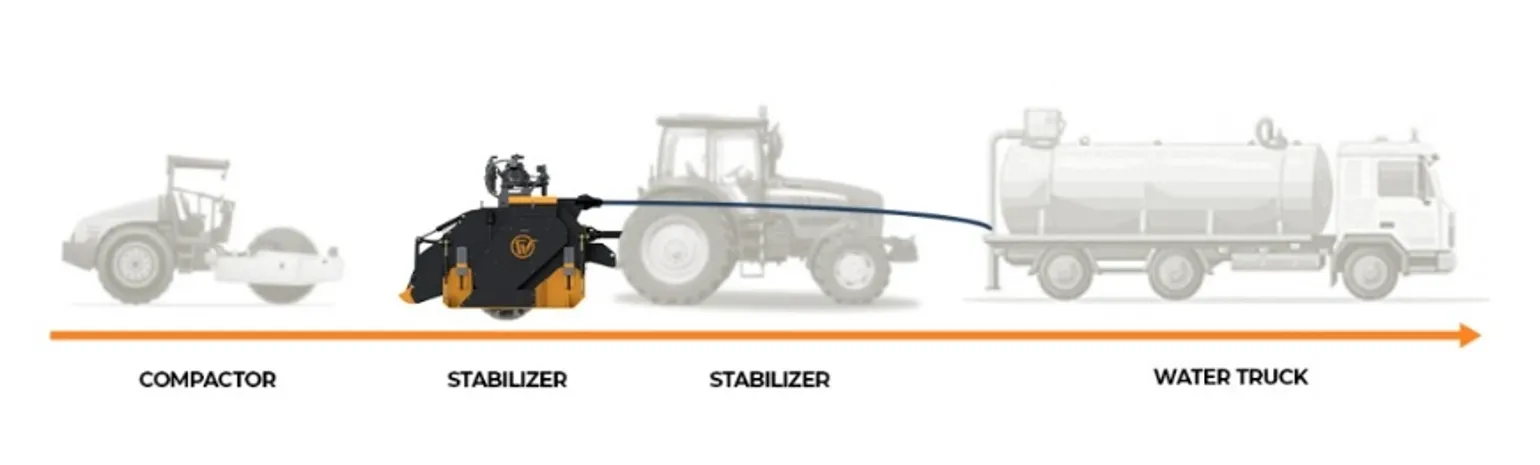
Soil-cement stabilization — the THOR ST mixes cement into existing soil to harden it like concrete
Why Soil + Cement Hardens
When Portland cement comes into contact with moist soil, the cement undergoes hydration — reacting with the water to form calcium silicate hydrate (CSH) and calcium aluminate hydrate (CAH) crystals. These microscopic crystals grow outward from each cement particle and through the pore spaces between soil particles, gradually filling the voids and binding the soil particles together into a rigid, interlocking matrix.
The process is chemically identical to what happens inside a concrete mix — the same minerals form, the same crystal structure develops, and the same permanent bonding is achieved. The difference is that concrete uses precisely graded crushed stone and sand as aggregate; soil-cement uses the existing soil — irregular, variable, and often fine-grained — as aggregate. This is why soil-cement is weaker and more permeable than concrete, but for the applications where it is used (road subgrade, driveways, farm tracks, hardstands), its strength of 1.5–3.0 MPa is more than adequate.
Key Advantage Over Concrete
Soil-cement uses the existing soil as the aggregate. No quarrying, no crushing, no transport, no disposal of the existing material. The raw material is already at the construction site — making soil-cement 30–50% cheaper than concrete for large-area applications like road subgrade and hardstands.
Soil Types That Can Be Hardened with Cement
Not all soils respond equally well to cement stabilization. Understanding your soil type before starting is critical to achieving the target strength.
| Soil Type | Cement Response | Pre-Treatment Required | Typical Cement Content |
|---|---|---|---|
| Sandy / granular soil (PI < 10) | Excellent — uniform mixing, good strength gain | None | 3–6% OPC |
| Low-PI silt and loam (PI 10–20) | Good — requires thorough mixing | None | 5–8% OPC or PPC |
| Medium clay (PI 20–35) | Moderate — check for sulphates first | Consider lime modification first | 6–9% OPC |
| Black Cotton Soil (PI > 35) | Poor without pre-treatment — expansion breaks cement matrix | Mandatory lime pre-treatment (4–6% CaO) | 4–7% OPC (second stage) |
| Organic soil (> 2% organic) | Poor — organic acids inhibit cement hydration | Not recommended without organic removal | Very high — not cost-effective |
What You Need
- Portland cement (OPC or PPC): 5–9% by dry soil mass for most soils. OPC for temperatures below 35°C; PPC for hot weather above 35°C to extend the working window
- The existing soil: Sandy, silty, or low-plasticity clay soils work best. Black Cotton Soil must be lime pre-treated before cement application
- Water: Sufficient to reach Optimum Moisture Content (OMC) — typically 10–18% for most soils. OMC is the moisture level at which the mix achieves maximum density when compacted
- Mixing equipment: Rotary tiller for small areas (up to 200–300 m²); soil stabilizer machine for road-scale projects (1,000+ m²). Soil stabilizer machines achieve more uniform mixing to greater depths
- Compaction equipment: Plate compactor (small areas, up to 1,000 m²); vibrating roller (roads, large hardstands). Compaction must achieve minimum 95% Modified Proctor MDD (97% for IRC:SP:89 road projects)
Step-by-Step: How to Harden Dirt with Cement
- Prepare the surface: Remove vegetation, tree roots, large rocks (> 50 mm), and any organic debris. Grade the surface to the design level with a slight cross-fall (1–2%) for drainage. Scarify (loosen) the top 100–200 mm with a tiller or scarifier — the soil must be loose and friable before cement is applied. Compacted crust or hard pan must be broken up first.
- Apply cement at the design rate: Spread cement evenly across the prepared surface using a binder spreader or manual spreading for small areas. For a 150 mm treatment depth on sandy soil at 5–6% OPC: approximately 13–15 kg/m². For a 150 mm treatment depth on clay at 7–8% OPC: approximately 17–20 kg/m². Uneven cement application produces uneven strength — areas with less cement will be weaker and may fail first.
- Mix cement into the soil: Mix the cement into the soil to the full treatment depth using a rotary tiller or soil stabilizer machine. Make at least two passes — the first pass to incorporate the cement into the top half of the treatment depth, the second to achieve full-depth uniformity. The mix should look consistent — no visible white streaks of unmixed cement powder or unmixed soil zones.
- Check and adjust moisture content: The mix should feel like damp sand — it clumps firmly when squeezed in your fist but does not drip water when released. If too dry, add water and re-mix. If too wet, allow to dry slightly before compacting. Do not over-wet — a slurry that drips water will not compact to the required density. Correct moisture is critical: too dry or too wet both produce lower compaction density and weaker final strength.
- Compact within 2 hours of mixing (for OPC): Cement begins setting within 2 hours of contact with water at 20–30°C (faster above 35°C). Compaction must be completed before setting progresses beyond the workable stage. Use a plate compactor (100–150 mm layers) or vibrating roller (150 mm layers) to achieve full compaction. Target: firm, non-yielding surface that does not show tyre imprint when walked on in boots.
- Cure for 7 days: Apply a bituminous curing membrane immediately after final rolling — the cheapest and most effective method. Alternatively, cover with hessian sacking kept continuously damp. Plastic sheeting also works but must be weighted at edges to prevent wind uplift. Curing keeps moisture in the layer for continued hydration. Do not traffic the surface for 7 days — early loading permanently reduces final strength. After 7 days, the layer has reached 70–80% of its 28-day design strength.
Professional soil-cement stabilization on road project — uniform mixing and compaction to IRC:SP:89
Expected Strength — How Hard Does It Get?
| Cement Content | Soil Type | 7-Day UCS | 28-Day UCS | Practical Equivalent |
|---|---|---|---|---|
| 3–4% | Sandy / granular | 0.8–1.5 MPa | 1.0–2.0 MPa | Firm stabilized sub-base |
| 5–7% | Low-PI silt / loam | 1.5–3.0 MPa | 2.0–4.0 MPa | IRC:SP:89 structural stabilization |
| 7–10% | Clay (lime pre-treated) | 2.0–4.0 MPa | 3.0–5.0 MPa | Strong road sub-base |
| 10–14% | Any soil | 4.0–8.0 MPa | 6.0–10.0 MPa | Lean concrete equivalent |
After 7 days of correct curing, a soil-cement surface will not soften when wet, will not rut under vehicle traffic, and will not dust or erode like untreated dirt. The chemistry that hardened it — CSH and CAH crystal bonding — is permanent. A correctly made soil-cement layer will outlast a gravel road by a factor of 3–5 times at significantly lower total cost.
Common Mistakes That Cause Soil-Cement to Fail
- Applying cement to Black Cotton Soil without lime pre-treatment: The cement will not bond uniformly through high-PI clay and the layer will fail within 1–2 monsoon cycles
- Not compacting within 2 hours: Cement that has begun to set before compaction produces a weak, poorly bonded layer that fails under traffic
- Too much or too little moisture: Both reduce compaction density and final strength. The correct moisture is OMC — not ‘as wet as possible’ or ‘as dry as possible’
- Trafficking before 7 days: Early loading breaks the forming crystal matrix and permanently reduces final strength
- Applying cement unevenly: Low-cement zones will be weak and fail first, undermining the adjacent stronger zones
When Professional Equipment Is Required
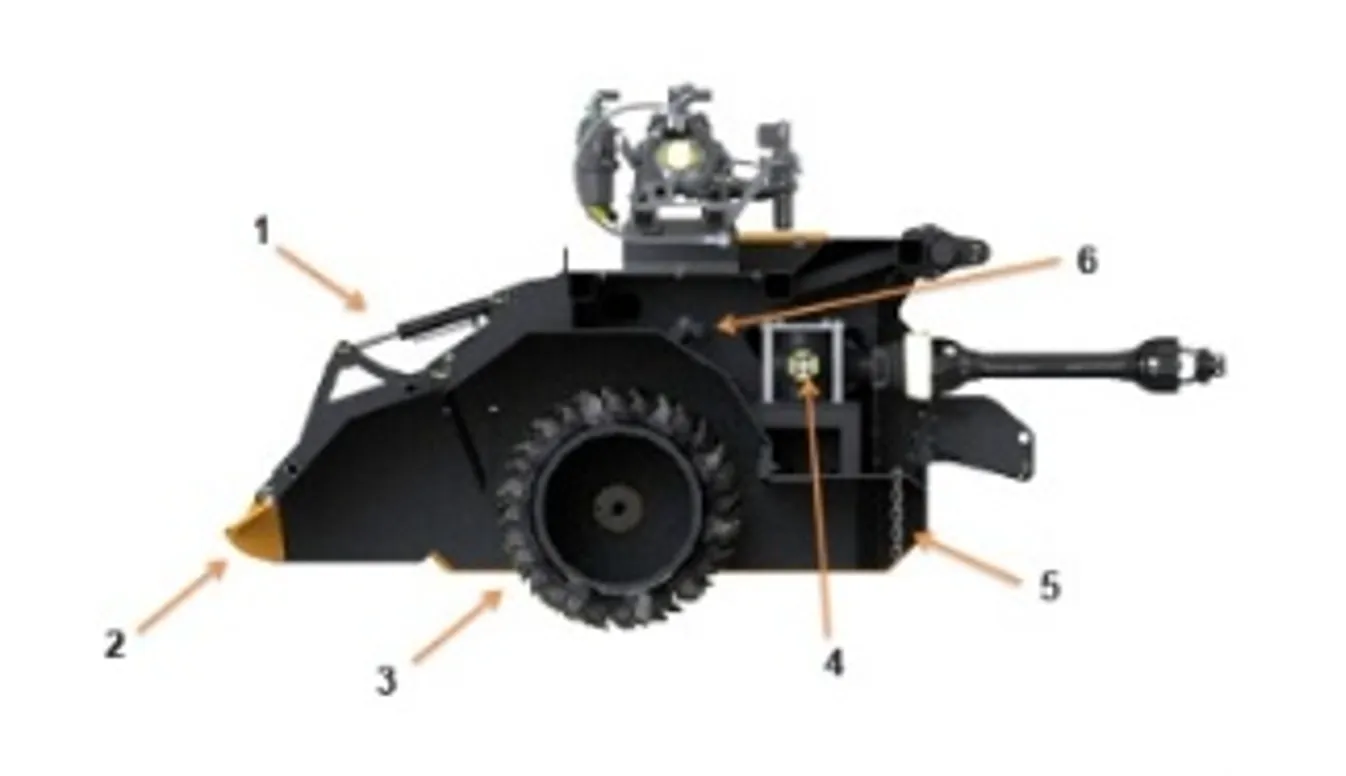
Manual spreading and small-tiller mixing is adequate for farm tracks, driveways, and hardstands up to 200–300 m². For national highways, state roads, PMGSY rural roads, airport aprons, and large industrial platforms, IRC:SP:89 requires professional-grade in-situ stabilization using a calibrated binder spreader (such as the DCW 2.2) and a soil stabilizer machine (THOR ST) — ensuring ±2% binder accuracy, uniform full-depth mixing, and controlled water injection that manual methods cannot achieve at scale.
Featured Equipment
THOR ST Soil Stabilizer Machine
IRC:SP:89 compliant · 350 mm depth · Uniform cement mixing at scale · India Watanabe
Key Takeaways
- Soil-cement stabilization mixes Portland cement into existing soil — no imported aggregate needed, 30–50% cheaper than concrete for large areas
- Portland cement forms permanent CSH crystals that bind soil particles — the same chemistry as concrete, using soil as aggregate
- Mix cement at 5–9% by soil mass, bring moisture to OMC, compact within 2 hours, cure for 7 days — four non-negotiable steps
- Black Cotton Soil requires lime pre-treatment (PI reduction) before cement — skipping this is the most common failure cause
- Achieves 1.5–5.0 MPa at 7 days — sufficient for road subgrade, driveways, farm tracks, and industrial platforms
- Professional equipment (soil stabilizer machine + calibrated spreader) required for IRC:SP:89 compliance on road projects